

How to Launch a Custom Enamel Pin Print on Demand Business
Custom enamel pins are tiny art pieces that can turn a plain tote, a teacher’s badge, or a nurse’s uniform into a personal statement. They’re cheap to make, easy to ship, and fans love the sparkle they add to everyday gear.
If you’re a mom who wants a cute badge for the school run, or a dad looking for a quirky badge for a bike helmet, custom enamel pin print on demand lets you design, list, and sell without inventory. Upload a simple vector, pick a metal finish, and the POD partner prints and ships each pin when a buyer clicks “buy.”
Here’s a quick way to get started: 1) Sketch a design on paper or in a free tool like Canva. 2) Convert it to a 300 dpi PNG with a transparent background. 3) Choose a POD platform that prints enamel pins and offers a mock‑up so you can see the final look. 4) Set a price that covers the base cost (usually $4–$6) plus your margin. 5) Write a short, heartfelt description that tells why a teacher would love it for classroom rewards or why a nurse might use it as a morale badge.
While you focus on pins, you can also add stickers or labels from a partner like JiffyPrintOnline. Bundling a small extra boosts order value with little effort.
Need more step‑by‑step guidance on POD basics? Check out Everything You Need to Know About Custom Floral Mug Print on Demand for a solid overview of design prep, pricing tricks, and marketing hacks that work the same way for enamel pins.
Designing Your Pin: Artwork Tips for Custom Enamel Pin Print on Demand
Your pin's look is the first thing a buyer notices. Keep the idea simple and bold so it reads clear even at a tiny size.
Start with a sketch. A quick doodle on paper or a basic shape in Canva helps you see what works. Stick to two or three colors; more shades can blur when the pin is made.
Next, turn that sketch into a clean vector. Use a program like Inkscape or the free editor on Canva and export a 300 dpi PNG with a transparent background. The transparent file lets the metal show through where you want a pop of shine.
Think about line weight. Thick lines stay sharp; thin details can disappear. If you’re making a badge for teachers, a bold apple or a simple book icon reads well. For dads who love bike helmets, a solid helmet silhouette works best.
Add a little texture. A subtle gradient or a tiny sparkle can give depth, but don’t overdo it. Remember, the enamel will fill the recessed areas, so any gradient should be in the metal finish, not the enamel itself.
Choose the right metal finish. Gold, silver, or a matte black each set a different mood. Many creators pair a gold outline with a matte fill for a classy look.
Before you send the file, preview the mock‑up on your POD platform. If the preview looks fuzzy, go back and clean up the edges.
You can also bundle a small extra like a sticker from JiffyPrintOnline to sweeten the deal. A sticker of the same design adds value without much extra cost.
Now that your artwork is set, think about how you’ll market it. A clear, keyword‑rich title and a short story help shoppers picture the pin on their bag or badge.
If you need inspiration for branding, check out a custom sober apparel guide. The same design habits apply to pins, so you can reuse what you learn.
Finally, consider where you’ll list the pin. Platforms like Velio give you easy checkout and built‑in SEO tools, so you spend more time creating and less time tweaking.

Choosing Materials and Sizes for Your Custom Enamel Pin
When you pick the metal and the size, you decide how the pin will feel in a hand. A mom who wants a tiny carrot badge will need a soft finish that won’t snag on a stroller strap. A nurse who likes a heart pin might prefer a sturdy metal that can stand up to long shifts.
Pick the metal
Most POD shops offer four basics: brass, copper, gold‑filled, and black nickel. Brass is cheap and shines, but it can tarnish. Gold‑filled looks luxe and stays bright. Black nickel gives a modern vibe and hides scratches.
Think about where the pin will live. If it’s on a school bag, a matte finish hides dust. If it’s on a badge holder, a shiny finish catches the eye.
Decide the size
Standard pins run 12‑18 mm. Anything under 12 mm loses detail fast – a tiny word will be unreadable. Anything over 20 mm needs bold shapes; otherwise the design looks crowded.
Here’s a quick cheat sheet:
- 12 mm – perfect for simple icons or single letters.
- 15 mm – works for two‑tone designs or a small phrase.
- 18 mm – best for detailed silhouettes or tiny scenes.
Before you lock in, print a quick mock‑up and hold it up to a backpack or a lab coat. Does the metal catch the light? Does the size feel right in the pocket?
Test the feel
Grab a sample of the metal finish your POD partner offers. Rub it with a cloth. If it feels too sharp, ask for a softer plating. If it looks dull, consider a brushed option instead.
Need a quick refresher on the whole POD workflow? Check out this guide on print on demand basics – the steps are the same for pins.
Once the metal and size match the vibe you’re after, you’ll have a pin that looks good, feels good, and sells well.
Setting Up Your Print‑on‑Demand Workflow (Video Walkthrough)
First, pick a POD platform that sells enamel pins. TeninoVentures works with several sites, but you just need one that lets you upload a vector and shows a live mock‑up.
Upload your artwork
Save the design as a 300 dpi PNG with a transparent background. Then drag it into the platform’s upload box. The system will snap it to a pin template so you can see how it looks on a metal base.
Select metal and size
Pick the finish you like, like brushed gold, matte black, or shiny copper. Choose a size from the cheat sheet: 12 mm for a simple icon, 15 mm for a short phrase, 18 mm for more detail. The preview will show the exact look.
Set pricing and shipping
Enter the base cost (usually $4–$6) and add a margin that feels fair. Most platforms let you set a flat shipping fee or use their calculated rates. Test the total price on a phone screen, you want it to look good and be easy to pay.
Enable a mock‑up video
Some sites let you add a short video of the pin spinning. If yours does, upload a 10‑second clip. It helps moms, dads, teachers, and nurses picture the pin in real life.
Place a test order
Order one pin for yourself. Hold it, check the colour, and see how the finish feels. If anything looks off, go back and tweak the file or finish.
Need a deeper look at each step? Check out the full POD workflow guide for more detail.
When you finish, you’ll have a ready‑to‑sell pin that matches the vibe your audience wants.
Comparing Top Print‑on‑Demand Platforms for Enamel Pins
When it comes to custom enamel pin print on demand, not all POD sites are built the same. Some give you a live 3‑D mock‑up, others charge extra for metal finishes, and a few let you set your own shipping rates. Here’s a quick look at the top choices so you can pick the one that fits your mom‑or‑dad audience.
TeninoVentures
Our own TeninoVentures platform tops the list. It offers a built‑in mock‑up that spins the pin, lets you choose brushed gold, matte black or copper, and shows the exact price after you add your margin. Because we work with families, the UI is simple and the help centre speaks the language of teachers and nurses.
Printful
Printful is a big name in POD and does enamel pins too. It has a decent mock‑up tool, but the metal‑finish options are limited to plain and gold‑filled. Shipping is flat‑rate per order, which can be pricey for small batches. The dashboard is clean, yet you’ll find fewer local payment options for UK shoppers.
Printify
Printify connects you with a network of suppliers. You can pick from three pin makers, giving you a range of finishes and pricing. The downside is that mock‑ups are static images, so you can’t see the pin spin. Shipping rates vary by supplier, so you need to test each one before you launch.
If you want a deeper dive into how POD pricing works, check out the guide on Everything You Need to Know About Custom Floral Mug Print on Demand.
| Platform | Live mock‑up | Metal finishes | Shipping calc. |
|---|---|---|---|
| TeninoVentures | Yes, 3‑D spin | Gold‑filled, matte black, copper | Real‑time rates |
| Printful | Yes, static view | Plain, gold‑filled | Flat‑rate per order |
| Printify | No, static image | Varies by supplier | Supplier‑based |
Pick the platform that gives you the finish you need, the price transparency you want, and a mock‑up that lets your buyers see the pin in action. The right choice can save you time, keep margins healthy, and make the buying experience smooth for moms, dads, teachers and nurses.
Shipping, Fulfillment, and Branding Strategies for Your Pins
When your pin leaves the printer, the real work starts. You want it to arrive safe, cheap, and on brand. Let’s break it down.
Pick the right shipping method
Small batches are cheap with flat‑rate services, but they can add up if you ship one pin at a time. Look for a carrier that offers real‑time rates so you can show buyers the exact cost before checkout. Many POD platforms let you toggle between standard mail and tracked parcels – choose tracked for teachers and nurses who need reliable delivery.
Tip: bundle a tiny thank‑you note or a sticker. It costs pennies, but it adds a personal touch that moms and dads love.
Fulfill fast, keep quality high
Test a sample order yourself. Hold the pin, check the colour, and feel the metal finish. If the metal feels sharp, ask the supplier for a smoother plating. A quick quality check saves returns later.
Set up automatic order notifications so you know when a pin ships. That way you can answer buyer questions right away.
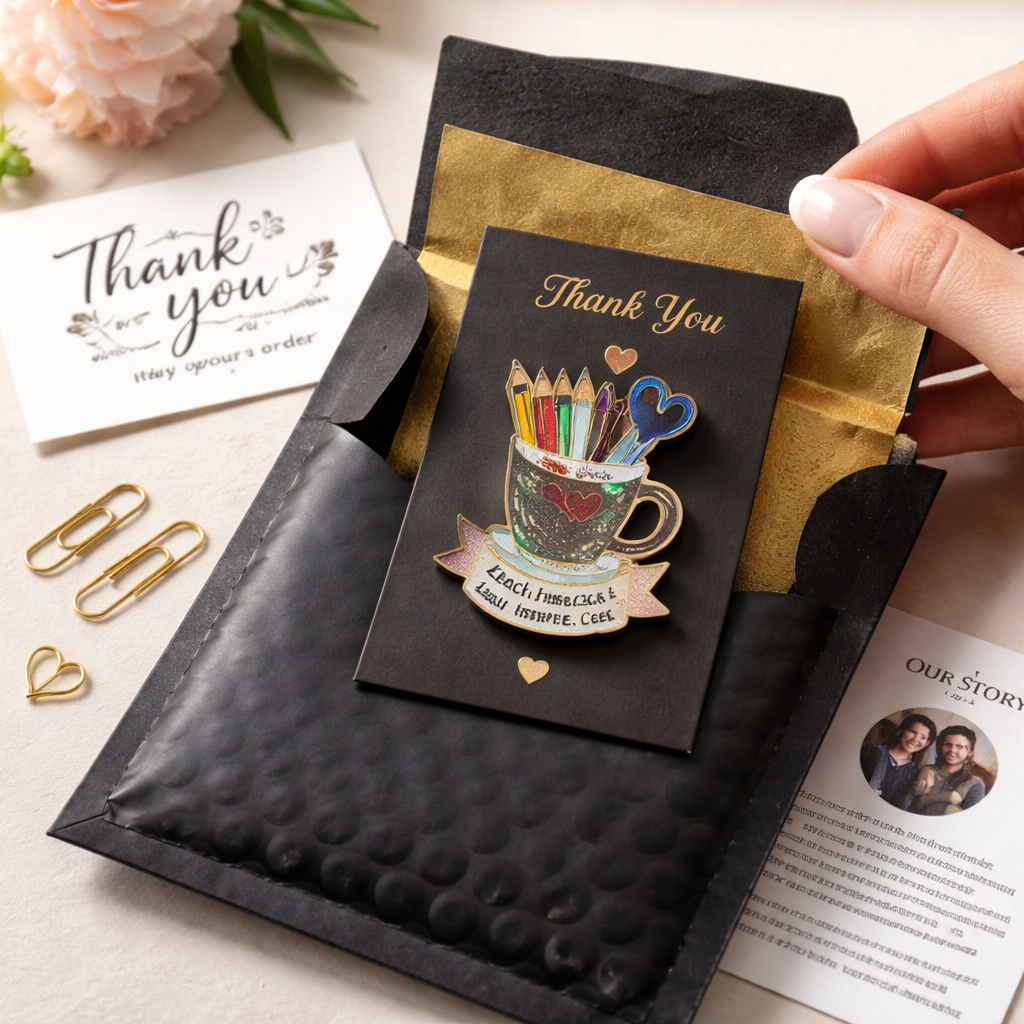
Brand the unboxing
First impressions happen in the box. Use a simple branded mailer that shows your logo and a short line about why the pin matters. A matte black sleeve or a gold‑lined envelope matches a brushed‑gold finish and feels premium.
Include a tiny card that tells the story behind the design – maybe a teacher’s badge idea or a nurse’s heart symbol. People remember the story, not just the product.
Want a deeper dive on how to price shipping and keep margins healthy? Check out the full shipping and fulfillment guide for step‑by‑step tips.
Finally, keep an eye on carrier updates. Rates change, and a small tweak can save you a few dollars per order – enough to keep your profit line happy.
FAQs
How does custom enamel pin print on demand work?
When you use a custom enamel pin print on demand service, you upload your artwork, pick metal, enamel type, and size, then the provider prints each pin only after a customer buys it. The order goes straight from the factory to the buyer, so you never hold inventory. You pay the base cost plus any margin you set, and the platform handles payment, production, and shipping.
What file format should I use for my pin design?
The safest format is a 300 dpi PNG with a transparent background. A PNG keeps the edges crisp and shows exactly what the enamel will look like. If you work in Illustrator, you can also export a vector PDF; the printer can scale it without losing detail. Just make sure the file size stays under the upload limit the POD site sets.
How long does it take to get a sample pin?
Most POD shops promise a 3‑5 day production window for enamel pins, then add the carrier’s transit time. In practice you’ll see a sample arrive in about a week if you choose the standard shipping option. Some providers let you pay extra for express production, which can shave a day or two off the lead time. Check the provider’s FAQ page for exact dates.
Can I order just one pin to test the market?
Yes, you can order a single pin to test the market. Print‑on‑demand services let you buy a one‑off sample without any minimum order requirement. This lets you see the metal feel, enamel finish, and packaging in real life before you list the design. Just be ready for the per‑unit price to be higher than when you order in bulk.
What are the best materials for pins that teachers will use?
Teachers often need pins that can survive a busy classroom and still look bright. Hard enamel on iron gives a sturdy feel and a smooth, glossy surface that won’t chip easily. If you want a softer look, soft enamel on zinc works well and is lighter for lapels. Stick to two or three colors so the design stays clear even from a distance.
How do I handle shipping and branding for my pins?
To keep branding strong, print a small thank‑you card or tissue with your logo and a short note inside the pin box. Use the same colour palette you show in your product photos so the pack feels like part of a collection. Set up automatic email alerts that include the tracking link and ask buyers for a quick review; this keeps the conversation going after the pin lands.
Conclusion
We've walked through every step of making a custom enamel pin print on demand, from sketch to shipping.
Now you know how to keep designs simple, pick the right metal, and add a tiny thank‑you note that feels personal.
Does it feel doable? Absolutely. With a platform like TeninoVentures you can order a single sample, see the finish, and launch without ever holding inventory.
Remember the three quick rules: clear artwork, right size, and thoughtful packaging. Stick to them and your pins will look sharp and sell fast.
Ready to turn that idea into a real pin? Start a test order today and watch your design come to life.
If you ever worry about cost, keep colors to two or three and choose zinc for a lighter feel; the price stays low and teachers love the durability.
Give it a try and watch the smiles when a mom pins your design on her kid's backpack.
Leave a comment
This site is protected by hCaptcha and the hCaptcha Privacy Policy and Terms of Service apply.