
Watercolor Mug Print on Demand: A Step‑by‑Step Guide for Creatives
Watercolor mugs sell faster than you think. A splash of hand‑painted art on a coffee cup can turn a simple sip into a memorable moment.
The soft gradients and gentle bleed of watercolor match the cozy vibe many parents, educators, and nurses look for daily. Because the design feels personal, buyers are willing to pay a premium.
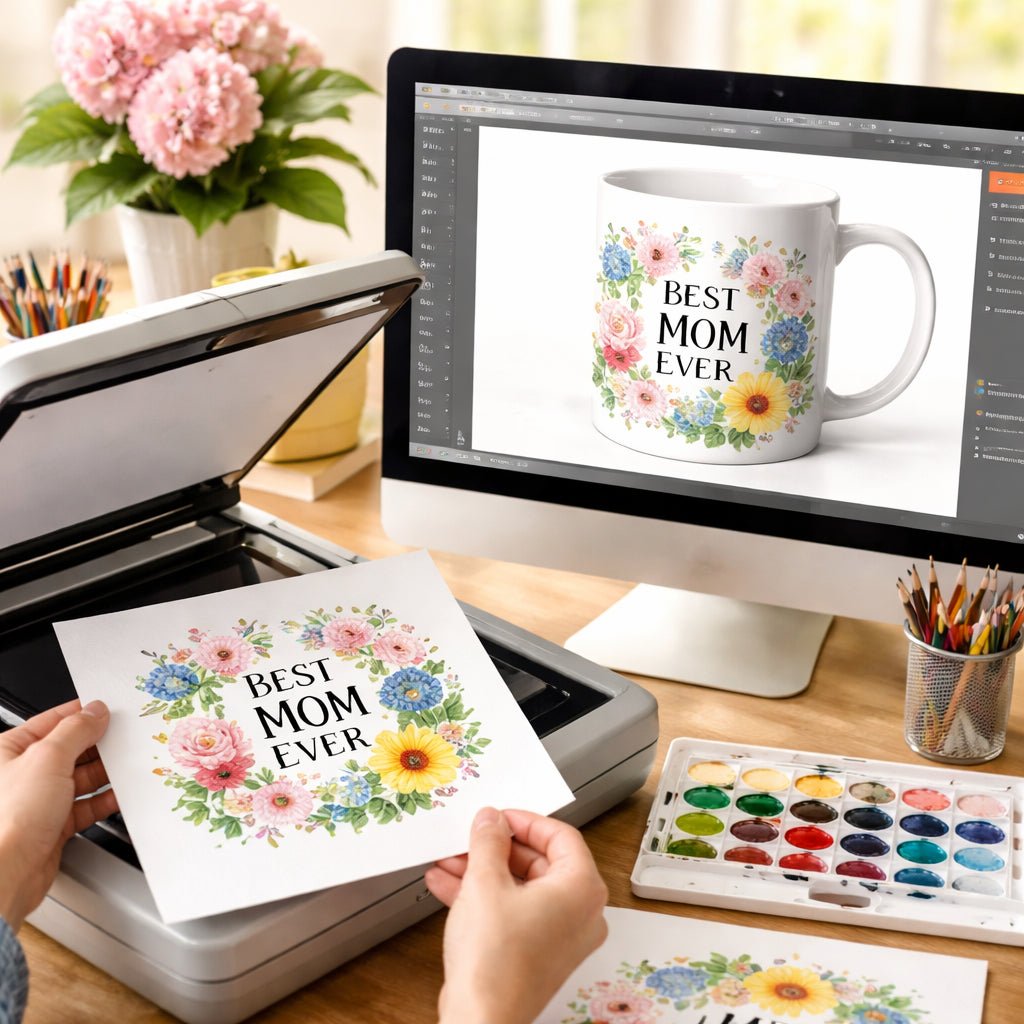
A mom might add a calming sunrise in pastel pinks to her mug, scan it, and upload it to a POD site—minutes later a unique mug is ready to ship.
A teacher could frame a watercolor apple with a chalk‑board border for back‑to‑school mugs. Students notice the detail and the teacher gets a small boost of appreciation.
Here’s how to start: sketch a simple watercolor, scan at 300 dpi, drop it into a mug mock‑up, pick a POD service with full‑wrap printing, set a price and publish.
For a step‑by‑step walkthrough of setting up a funny coffee mug design, check out our guide on how to create and sell a print‑on‑demand funny coffee mug.
Once the mug is live, share it in parent groups, teacher forums, or nurse break‑rooms, and watch orders roll in. Your watercolor art can become a daily habit that keeps customers coming back.
Step 1: Choose the Right Design Tools for Watercolor Mug Prints
First thing you need is a tool that lets you paint soft shades without a mess. A simple drawing app on a tablet works great, but if you love paper, a good set of watercolor pencils and a scanner can do the job.
Try a free app like Autodesk SketchBook or Krita. Both let you pick a brush that mimics a real paint tip. Set the canvas size to 12 × 8 inches – the typical print size for a mug wrap.
If you prefer paper, use 300 dpi when you scan. That keeps the edges sharp and the colors bright. Save the file as a PNG so the background stays clear.
When you move from sketch to screen, watch the file size. A 5 MB PNG is easy for most POD platforms, but anything over 10 MB can slow down uploads.
Now you have a digital file that’s ready for a mock‑up. Drag it onto a mug template in Photoshop, GIMP, or a free online mock‑up generator. Make sure the edges line up with the cup’s curve so the print looks smooth.

Tip: Keep your colour palette to three or four shades. Too many colours can make the print look busy when it wraps around the mug.
One practical step is to test the file on a sample mug before you list it. TeninoVentures makes it easy to order a proof copy, so you can see how the water‑based hues look in real life.
Finally, back up your original scan and the edited PNG. Store them in a cloud folder you can reach from any device. That way you can tweak the design later without starting from scratch.
Step 2: Prepare Your Watercolor Artwork for Print Quality
Now that you have a clean scan, the next job is to make sure the file will survive the heat of a mug printer. Think of your art like a recipe, a few small tweaks can keep the colours bright and the edges sharp.
First, set the canvas size to the exact dimensions the POD service asks for. Most full wrap mugs need a 9.5 × 8.5 inch canvas at 300 dpi. If you go a bit bigger, the printer will trim the extra part, and you might lose detail.
Second, check the colour profile. Switch to sRGB if you’re still in Adobe RGB or Procreate’s default. sRGB matches what most printers expect, so the pinks you see on screen stay pink on the mug.
Third, clean up the background. A transparent PNG removes any unwanted white box around your painting. Use the magic wand tool to erase stray specks, then save a copy with transparency turned on.
Fourth, add a safe zone. Leave at least a 0.25 inch margin around the edge of the design. This keeps the main subject away from the rim where the printer’s grip can cut off detail.
Fifth, test the file in a mock up. Upload the PNG to a free 3D mug mock up tool and rotate it. Look for any stretch or colour shift. If something looks off, go back to the file and adjust size or contrast.
Finally, export the file as a PNG with maximum quality settings. Avoid JPEG, the compression can make watercolour edges look blotchy.
If you need extra tips on how to match your art to different mug shapes, the personalized travel mug print guide walks you through the most common pitfalls.
With these steps done, your watercolor file is ready for a crisp, vibrant print that will survive daily coffee runs.
Step 3: Select a Print‑On‑Demand Provider and Set Up Your Store
You’ve polished the file, now you need a partner that will actually print it on a mug. The choice of provider decides how fast you get orders, how the colours look, and how much you keep.
First, check the catalog. Some POD sites only offer plain white mugs, while others give pastel, enamel or travel styles. Look for a service that lists “full‑wrap watercolor printing” – that’s the only way your soft gradients stay true.
Second, weigh the fee structure. Some platforms charge a flat fee per mug, others add a percentage on top of the base cost. Pick the model that lets you set a price you’re comfortable with, especially if you’re selling to moms or teachers who watch their budget.
Third, test the mock‑up tool. A good provider will let you upload your PNG, place it on a 3‑D mug, and see the final look before you publish. If the preview looks dull or stretched, you’ll need to tweak the file or switch services.
When you’ve settled on a provider, create an account and link it to your sales channel. TeninoVentures works straight with Etsy, so you can keep everything in one place. If you prefer a standalone shop, most POD services give you a ready‑made storefront that you can customize with your own branding.
Quick comparison of popular POD options
| Provider | Setup Ease | Key Feature |
|---|---|---|
| TeninoVentures | Very easy | Full‑wrap watercolor printing |
| Printful | Easy | Wide mug catalog |
| Gooten | Medium | Competitive pricing |
Once your store is live, add clear product titles, a short description that mentions “watercolor mug print on demand”, and a few lifestyle photos. Set a price that covers the base cost, your time, and a modest profit. Then hit publish and start sharing the link in parent groups, teacher forums, or nurse break‑rooms.
Need a deeper dive on picking the right floral mug provider? Check out our custom floral mug print on demand guide for more tips.
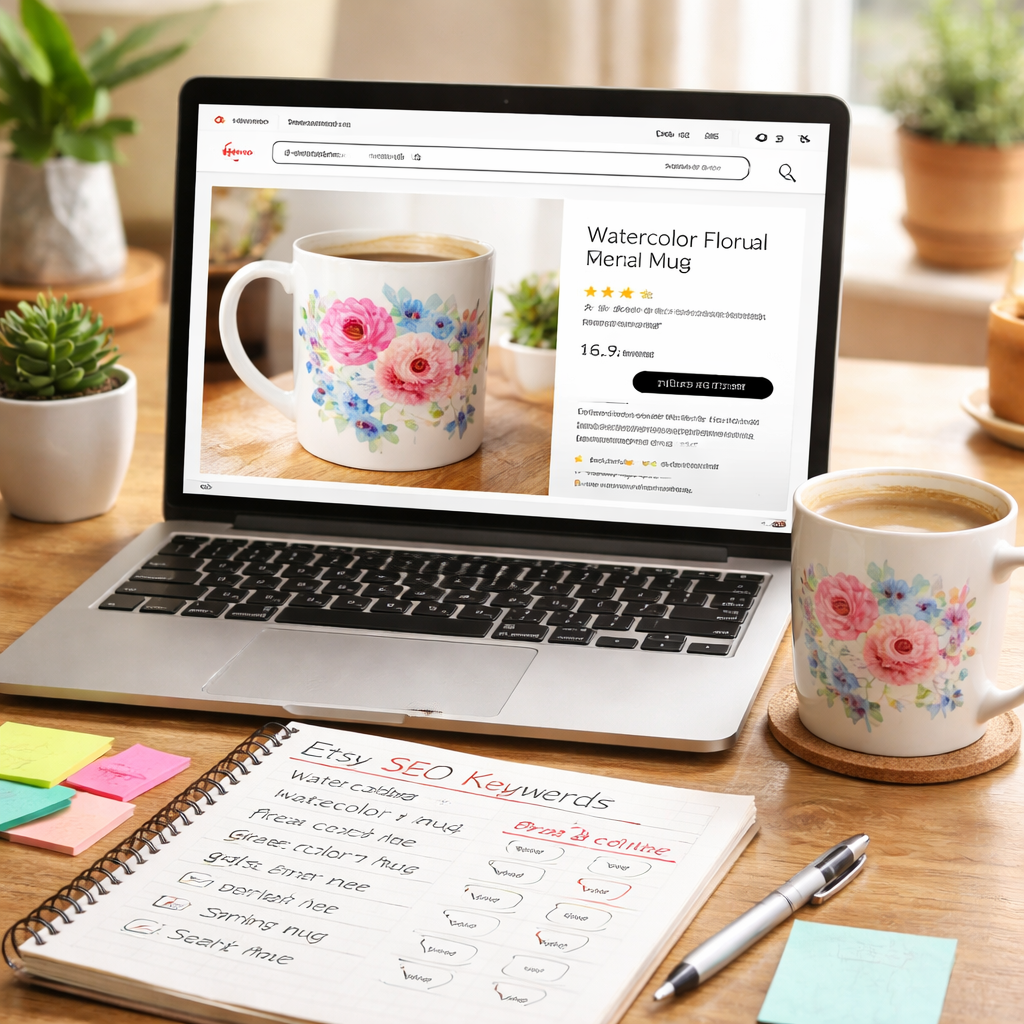
Step 4: Optimize Your Listings for SEO and Drive Traffic
Your watercolor mug looks great, but if nobody finds it, the sales won’t roll in. First, think like a shopper. What words would a mom, a teacher, or a nurse type into the search bar? Plug those exact words into your title.
Title tip: start with the main phrase, then add a detail. Example: Watercolor Sunflower Mug – Hand‑Painted Gift for Teachers. Keep it under 70 characters so Google shows it whole.
Write a punchy description
Use the first 150 words to sell the vibe. Mention the style, the size, and why it’s a perfect gift. Sprinkle the keyword “watercolor mug print on demand” naturally a couple of times. End with a clear call‑to‑action like “Add to cart now and enjoy a cozy coffee break.”
Tag like a pro
Etsy lets you add up to 13 tags. Use each one for a different search term: “watercolor mug”, “teacher gift”, “mom coffee cup”, “hand painted mug”, etc. No need for fancy synonyms – plain language works best.
Image tip: upload a bright photo of the mug in a real setting, then add an alt tag that reads “watercolor mug print on demand with pastel sunrise design”. That helps both shoppers and search bots.
Pricing matters too. Show the base cost, then add a modest margin. A clear price builds trust and keeps the checkout smooth.
When your listing is live, share the link in the places your audience hangs out – parent Facebook groups, teacher Pinterest boards, nurse Instagram feeds. A quick post with a lifestyle photo and a short story drives clicks.
Need more ideas on how to write copy that converts? Check out the TeninoVentures guide to custom floral mug print on demand for proven copy tips.
Conclusion
You've seen how a simple watercolor mug print on demand can turn a sketch into a shop‑ready product.
From picking the right tool to fine‑tuning tags, each step adds a tiny boost that compounds over time.
Remember, moms love a calming sunrise for morning coffee, teachers enjoy a playful apple for staff rooms, and nurses appreciate a soothing palette on break.
Keep testing one tag or one photo at a time. If clicks dip, swap it for a term you found in eRank. Small tweaks keep the listings fresh.
So what's the next move? Grab a sample, snap a behind‑the‑scenes shot, and push it to Instagram or Pinterest. Let the story of your watercolor mug print on demand reach the people who need it.
When the orders start to roll in, celebrate the quiet wins and plan your next design. Your creativity can keep paying off.
FAQ
What is a watercolor mug print on demand?
A watercolor mug print on demand is a service where you upload a hand‑painted design and a partner prints it on a mug only when someone buys it. No inventory, no waste. You get a ready‑to‑ship product that looks like a real watercolor because the printer uses full‑wrap printing. It lets you turn a sketch into a shop‑ready item with just a few clicks.
How do I choose the right file specs?
Start with a 12‑inch square canvas at 300 dpi and save as a PNG with a transparent background. That size fits most 11‑oz mugs and keeps the art crisp. Keep the colour mode in sRGB so the printer can convert it to CMYK without losing the soft tones. Name the file clearly, like sunrise‑mug‑v1.png, so you can find it later when you upload.
Which POD platforms work best for watercolor mugs?
Many creators start with Printdoors because it offers fast global fulfilment and good colour handling for water‑based prints. Printify gives you a big network of suppliers, but you’ll need to check each mug’s ink quality. TeninoVentures also runs a POD service that focuses on small‑batch runs and easy Etsy integration, making the set‑up quick for busy parents or teachers.
How should I price my watercolor mug for moms and teachers?
Think about what the buyer values: a hand‑drawn look, a gift feel, and the convenience of fast shipping. A common price range for an 11‑oz watercolor mug sits between $15 and $20. Add a few dollars if you use a premium rim or a special box. Test one price for a week, watch the sales, then tweak up or down a dollar.
What are the best ways to market my mug on social media?
Show the mug in a real scene, a mom sipping coffee at the kitchen table or a teacher holding it in the staff room. Post that photo on Instagram with a short story, and add the same image to Pinterest using the keyword “watercolor mug”. Run a tiny ad budget of $5 a day on Etsy’s promoted listings; the boost can bring a handful of clicks that turn into orders.
How do I handle colour shifts from sRGB to CMYK?
When you upload an sRGB file, the POD printer will change it to CMYK for printing. That can mute bright blues or greens. To see the shift early, open the file in a program that lets you preview CMYK, like GIMP or Photoshop. If the colours look dull, boost the saturation a bit in the original file before you export. A quick test print of a small strip can save you a lot of re‑orders.
Leave a comment
This site is protected by hCaptcha and the hCaptcha Privacy Policy and Terms of Service apply.