

How to Create a Perfect Custom Laptop Sleeve That Fits Your Style
Imagine you just got a brand‑new laptop for work. It's sleek, fast, and costs a few hundred bucks. You love it, but you also hate the idea of dropping it on the train. You glance at the desk and see a plain, cheap sleeve that looks like it was made for a notebook, not a high‑end device. You wonder, “How can I get something that looks good, fits right, and actually protects my laptop?” That’s the moment many of us face. A custom laptop sleeve can solve that problem. It adds a personal touch, guards your gear, and can even shout out your school, team, or brand. In the next few pages, we’ll walk you through every step – from picking the right material to measuring your laptop, designing the look, picking a maker, and comparing the top options. By the end, you’ll know exactly how to pick and enjoy a custom laptop sleeve that feels made just for you.
Step 1: Choose the Right Materials for Your Custom Laptop Sleeve
First thing’s first – you need to decide what your sleeve will be made of. The two big choices are leather and fabric, usually neoprene. Both protect well, but they feel and cost different things.
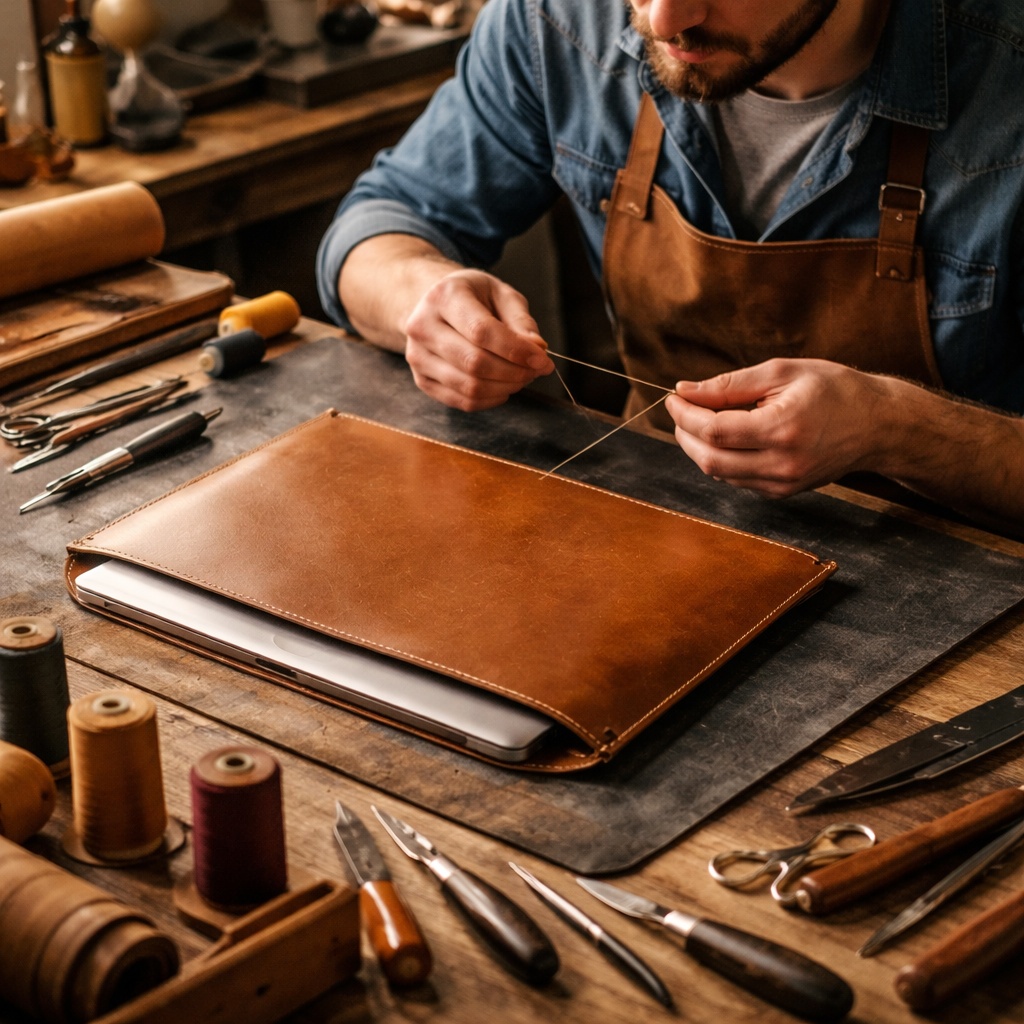
Leather looks sharp. It ages with a patina that many folks love. Real leather feels heavy and pricey, while vegan (PU) leather mimics the look for less cash. Leather sleeves can be embossed or printed with logos. They’re great for a boardroom vibe or a school uniform that wants a classy touch.
Fabric sleeves, especially neoprene, are lighter, water‑resistant, and cheaper. Neoprene is the most popular fabric for laptop sleeves worldwide. It’s spongy, durable, and can be printed in any color. You can add pockets, straps, or a felt lining for extra softness.
Here’s why the material matters:
- Weight: Leather adds heft; neoprene stays light.
- Cost: Leather runs higher; fabric fits tighter budgets.
- Style: Leather feels formal; fabric feels casual.
And don’t forget the budget. If you’re a mom ordering for the whole family, fabric may stretch your dollars further. If you’re a teacher wanting a sleek look for the staff room, leather might fit the vibe.
Below are two trusted sources that break down the pros and cons of each material:
- Is Leather or Fabric Better for Laptop Sleeve? – explains durability and cost differences.
- Lenovo’s Laptop Sleeve Glossary – lists features like waterproofing and padding.
And if you like a quick visual cue, check out this image:

Actionable tips:
- Set a max budget per sleeve before you start looking.
- Touch and feel sample swatches if you can – leather feels firm, neoprene feels soft.
- Ask the maker if they offer both real and vegan leather options.
Step 2: Measure Your Laptop Accurately
Now that you know the material, you need the right size. A sleeve that’s too tight will stress seams; one that’s too loose lets the laptop slide around.
Grab a ruler or a flexible tape. Close your laptop. Measure three dimensions: height, width, and depth.
Height (the short side)
Place the tape along the bottom edge of the closed lid, parallel to the short side. Add about 0.5‑1 inch (1‑2 cm) so the sleeve isn’t a squeeze.
Width (the long side)
Run the tape from left to right across the lid. Again, add a small margin. If you skip this, the laptop could wobble.
Depth (thickness)
Put the tape on a flat surface, then lift the laptop up and note how high it rises. Older, bulkier models need a half‑inch extra depth.
Why the extra space? A snug fit keeps the laptop from moving, but you still want room for a thin protective layer inside the sleeve.
Two reliable guides walk you through these steps:
- KNOMO’s measuring cheat sheet – offers clear diagrams.
- XOXO Charley’s size guide – notes a 0.25‑inch handmade margin.
Pro tip: Measure any attached accessories (like a keyboard cover) if you plan to keep them on while the laptop sits in the sleeve.
Actionable checklist:
- Write down all three measurements in inches.
- Add 0.5 inch to each for comfort.
- Compare your numbers to the maker’s size chart before ordering.
Step 3: Design Your Sleeve – Patterns, Colors, and Personal Touches
Design time is the fun part. This is where your custom laptop sleeve becomes truly yours. Think about what you want to show – a school mascot, a family photo, or a bold pattern.
You can go DIY or use a print‑on‑demand service like TeninoVentures. Either way, keep these points in mind:
- Pick colors that match your brand or personal taste.
- Choose a pattern that won’t clash with your logo.
- Leave space for a name or monogram if you want.
For a hands‑on project, the Core Fabric Store offers a free laptop sleeve pattern. It works for 13‑14‑inch laptops (small) or 16‑inch devices (large). The pattern includes a front pocket for chargers and a flap that can close with a snap or button.
Watch the step‑by‑step video below if you prefer to see the process in action:
And here’s the source for the free pattern:
Actionable design tips:
- Sketch your layout on graph paper first – it helps avoid costly mistakes.
- Use Pantone‑matched colors if you need brand consistency.
- Test the design on a plain fabric scrap before cutting the final piece.
Step 4: Select a Manufacturer or DIY Method
Now you have a design and the right size. The next decision is who will actually make the sleeve. You can either order from a custom maker or stitch it yourself.
Custom makers like Custom Logo Cases offer bulk pricing, material choices, and quick samples. Prices range from $6.50 for a basic neoprene sleeve up to $38 for a premium leather version. Minimum orders start at 10‑20 units, which works if you need sleeves for a class or a team.
Key things to ask a maker:
- What material options are available? (Neoprene, real leather, vegan leather)
- Do they offer padded foam or felt lining?
- What is the turnaround time for a sample?
And if you love the hands‑on feel, the DIY route uses the pattern we mentioned earlier. You’ll need fabric, a sewing machine, and a little patience. The result? A one‑of‑a‑kind custom laptop sleeve that tells your story.
Here’s a quick look at the maker’s pricing table (source: Custom Logo Cases):
Actionable steps to pick the right path:
- Request a free proof from the maker to see how your design looks on the actual material.
- Order a single sample before committing to a larger batch.
- If DIY, buy a fabric that matches your design’s weight and durability.
Step 5: Compare Popular Custom Sleeve Options
Not all custom laptop sleeves are created equal. Let’s break down the most common types so you can pick the best fit for your needs.
| Type | Material | Pros | Cons |
|---|---|---|---|
| Neoprene Sleeve | Neoprene | Lightweight, water‑resistant, easy to print. | May feel bulky for very thin laptops. |
| Leather Sleeve | Real or vegan leather | Professional look, ages well, durable. | Heavier, higher cost. |
| Felt Sleeve | Recycled felt | Soft interior, eco‑friendly. | Less water resistance. |
| Hard‑Shell Sleeve | Rigid polymer + soft lining | Maximum drop protection. | Less flexible, adds bulk. |
For deeper insights, check these two expert guides:
And here are three quick comparison points you can use right away:
- If you travel a lot, pick neoprene for its lightweight feel.
- If you want to showcase a logo in a corporate setting, leather gives a premium vibe.
- If you care about the planet, look for recycled felt or vegan leather.
Actionable advice:
- Make a list of must‑have features (water resistance, padding, pockets).
- Match those features to the table above.
- Order a sample of your top choice before bulk buying.
Conclusion – Your Perfect Custom Laptop Sleeve Awaits
Choosing a custom laptop sleeve isn’t rocket science. You start by picking the material that fits your style and budget. Then you measure your device to lock in the right fit. Next you design a look that feels personal, whether you use a free pattern or a print‑on‑demand service. After that, you decide if a maker or a DIY project works best for you. Finally, you compare the popular options and order a sample.
Follow the steps, use the tips, and you’ll end up with a sleeve that protects your laptop, shows off your brand or personality, and lasts for years. Ready to get started? Visit the maker’s site, grab a fabric swatch, or pull up the free pattern. Your laptop deserves a custom sleeve that’s as unique as you are.
Frequently Asked Questions
What material is best for a custom laptop sleeve if I travel often?
Neoprene is a great travel companion. It’s lightweight, water‑resistant, and cushions your laptop without adding bulk. Look for a sleeve that also has a zip closure and a soft inner lining to keep the device snug during flights or train rides.
How much extra space should I add when measuring my laptop?
Add about 0.5 inch (1 cm) to the height, width, and depth. This extra room lets the sleeve close comfortably and gives room for a thin foam pad if you want extra protection.
Can I add pockets for accessories on a custom laptop sleeve?
Yes. Many manufacturers include exterior or interior pockets for chargers, cables, or a stylus. When you design, leave a small rectangular area on the side or front for a pocket that won’t interfere with the main compartment.
Is vegan leather truly eco‑friendly?
Vegan leather avoids animal hide, but it’s usually made from synthetic PU, which isn’t biodegradable. Some brands use recycled PU or plant‑based alternatives, which lower the environmental impact. Check the maker’s material specs to be sure.
Do custom laptop sleeves protect against drops?
Custom sleeves add a layer of padding that helps with minor drops and bumps. For heavier impacts, consider a hard‑shell sleeve or a sleeve with reinforced foam. The right material and thickness can reduce damage from everyday slips.
How long does it take to get a custom laptop sleeve from a maker?
Most makers offer a 7‑day sample turnaround. Full production on bulk orders can take 2‑4 weeks, depending on the material and customization level. Always ask for a timeline when you request a quote.
Can I order a single custom laptop sleeve?
Many print‑on‑demand shops, including TeninoVentures, will make a one‑off sleeve for you. Bulk discounts usually start at 10‑20 units, but a single order is possible if you need a unique gift or prototype.
What if my laptop has a thick case already?
Measure the laptop with the case on. Add the same 0.5‑inch buffer to each side. Some sleeves are designed with extra depth to fit laptops that already have a protective case.
For more on related event ideas, check out Photo Booth Rental Murrieta: A Complete Guide for 2026 Events. You can also explore How to Choose the Perfect Prom Photo Booth Rental for an Unforgettable Night. Need ideas for video booths? Read Everything You Need to Know About 360 Video Booth Rental. If you’re planning a graduation party, see Photo Booth Rental for Graduation Party: A Step‑by‑Step Guide. For wedding magic, look at How to Choose the Perfect Wedding Photo Booth Rental: A Step‑by‑Step Guide. Corporate events? Check How to Choose the Best Corporate Event Photo Booth Rental for Your Business. Mirror booths? See Mirror Photo Booth Rental: 7 Must‑Know Tips for an Unforgettable Event. And for a San Diego vibe, read Your Complete Guide to Photo Booth Rental San Diego.
And for a quick peek at a custom design service, here’s a handy link: How to Choose and Enjoy a Custom Pet Portrait Mug on Etsy. This internal link gives a feel for how TeninoVentures helps creators personalize items.
Leave a comment
This site is protected by hCaptcha and the hCaptcha Privacy Policy and Terms of Service apply.